The Photo Studio | Part One: Equipment

Every journey begins with a single click…
Let’s get started with the first article in this series for ’The Photo Studio’ - beginning with the basics! In this series of tutorial articles I will cover what I have learned so far on my photography journey, and how that can help you as a professional, creative, blogger, or someone who just wants to learn more about photography! Every artist needs brushes and a blank canvas to begin, and a photographer is no different. There are some pieces of equipment that are essential, and others that are not required but can be very helpful for creative and technical growth. Read on to find out what tools you need to create beautiful images, and how to use them!

The Photo Studio Part One: Equipment
In this photography tutorial article I will cover:
Lighting Simplified [Why it’s important, the two main types, and what equipment you need to work with them]
Photography Essentials [Equipment you cannot go without]
The DSLR Camera [Digital Single Lens Reflex cameras, what they are and which one is best for you!]
Accessories [Perfect your skills with these helpful photography tools]
Do’s and Dont’s of using your equipment in action! [Must know info]
Tips and Tricks [Tips and Tricks for using your equipment when creating photographs for your business, blog or creative project]

Top - Kmart, Earrings - Bright and Beautiful, Clips - Aliexpress.com
Introduction to Photography | Myths and Truths
First let’s start with a simple break down of light. Why is it so important? Well, it’s essentially the paintbox of a photographer. We paint with light instead of a brush, and our canvas is the camera which ‘captures’ our artwork. I am often asked on the job ‘What type of camera do you use?’ and the simple answer is: It doesn’t matter so much which model/brand/make you use, it matters more how you use it. Your effectiveness at doing so will draw from your understanding of the tools you have. I like to give the metaphor of the master chef and his kitchen. When served a delicious dish at a fantastic restaurant, it is unlikely that you would compliment the chef on their kitchen, and more likely that you would compliment the technique of the chef in their cooking skills. It is less important what a master chef uses, and more important how he or she uses it. The same is true with photography, and the equipment a photographer uses. To create exquisite photographs, you must first master an understanding of the principles behind the equipment you are using; why you are making certain choices, and not just how to achieve a specific result.

Top down view of two digital Canon camera models.

Above: The Canon 550D [Entry Level DSLR]

Above: The Canon 5DMKII [Professional DSLR]
To demonstrate the importance of understanding the principles of photography as a foundation for your creative development, here are the results of two different models of Canon DSLR [Digital Single Lens Reflex] cameras: The 5D MKII designed for professional use, and the 550D considered an entry level model. I photographed the same natural light scene of a coloured paper selection, displayed on the floor. The colour range of the 5D MKII is superior in its spectrum and accuracy, but with effective lighting, appropriate camera settings, and a well-planned subject and composition both models achieve a satisfactory result both technically and creatively. It is true that better equipment is often more expensive, a larger variety of functions can often mean a higher price point. But the extent to which these resources can be fully utilised depends mostly on the person behind the camera, and the knowledge they have at their disposal.
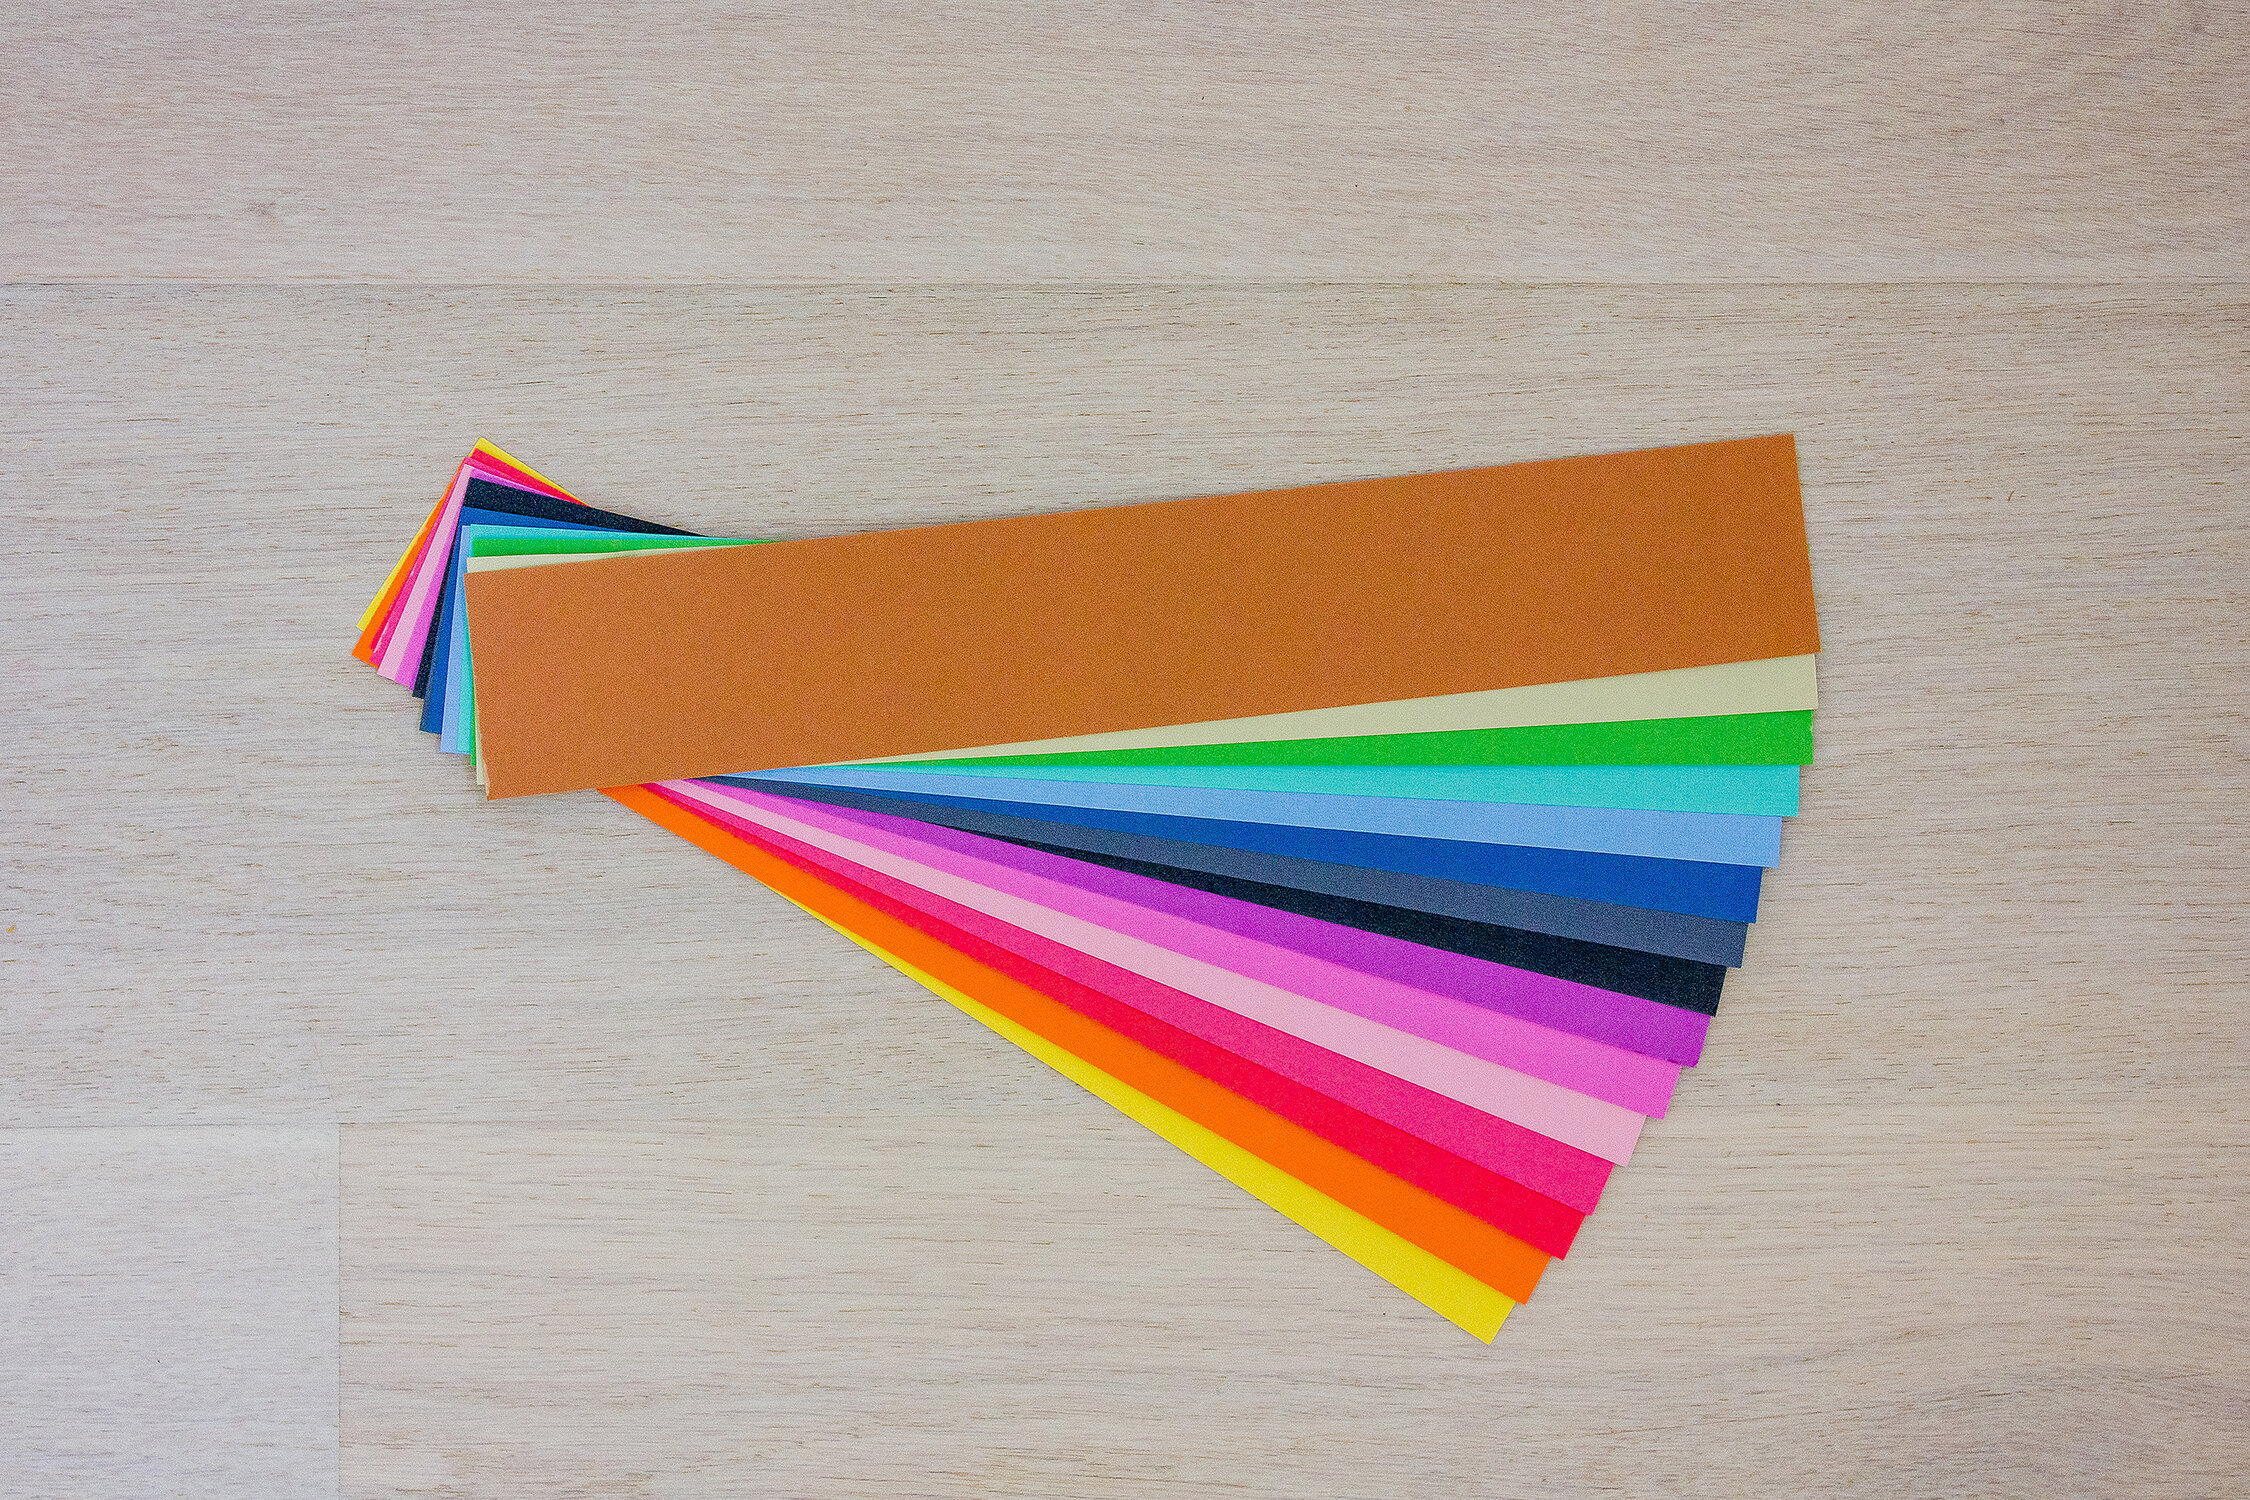
Above: Image captured in the 550D [800 ISO 5.0 and 1/250]
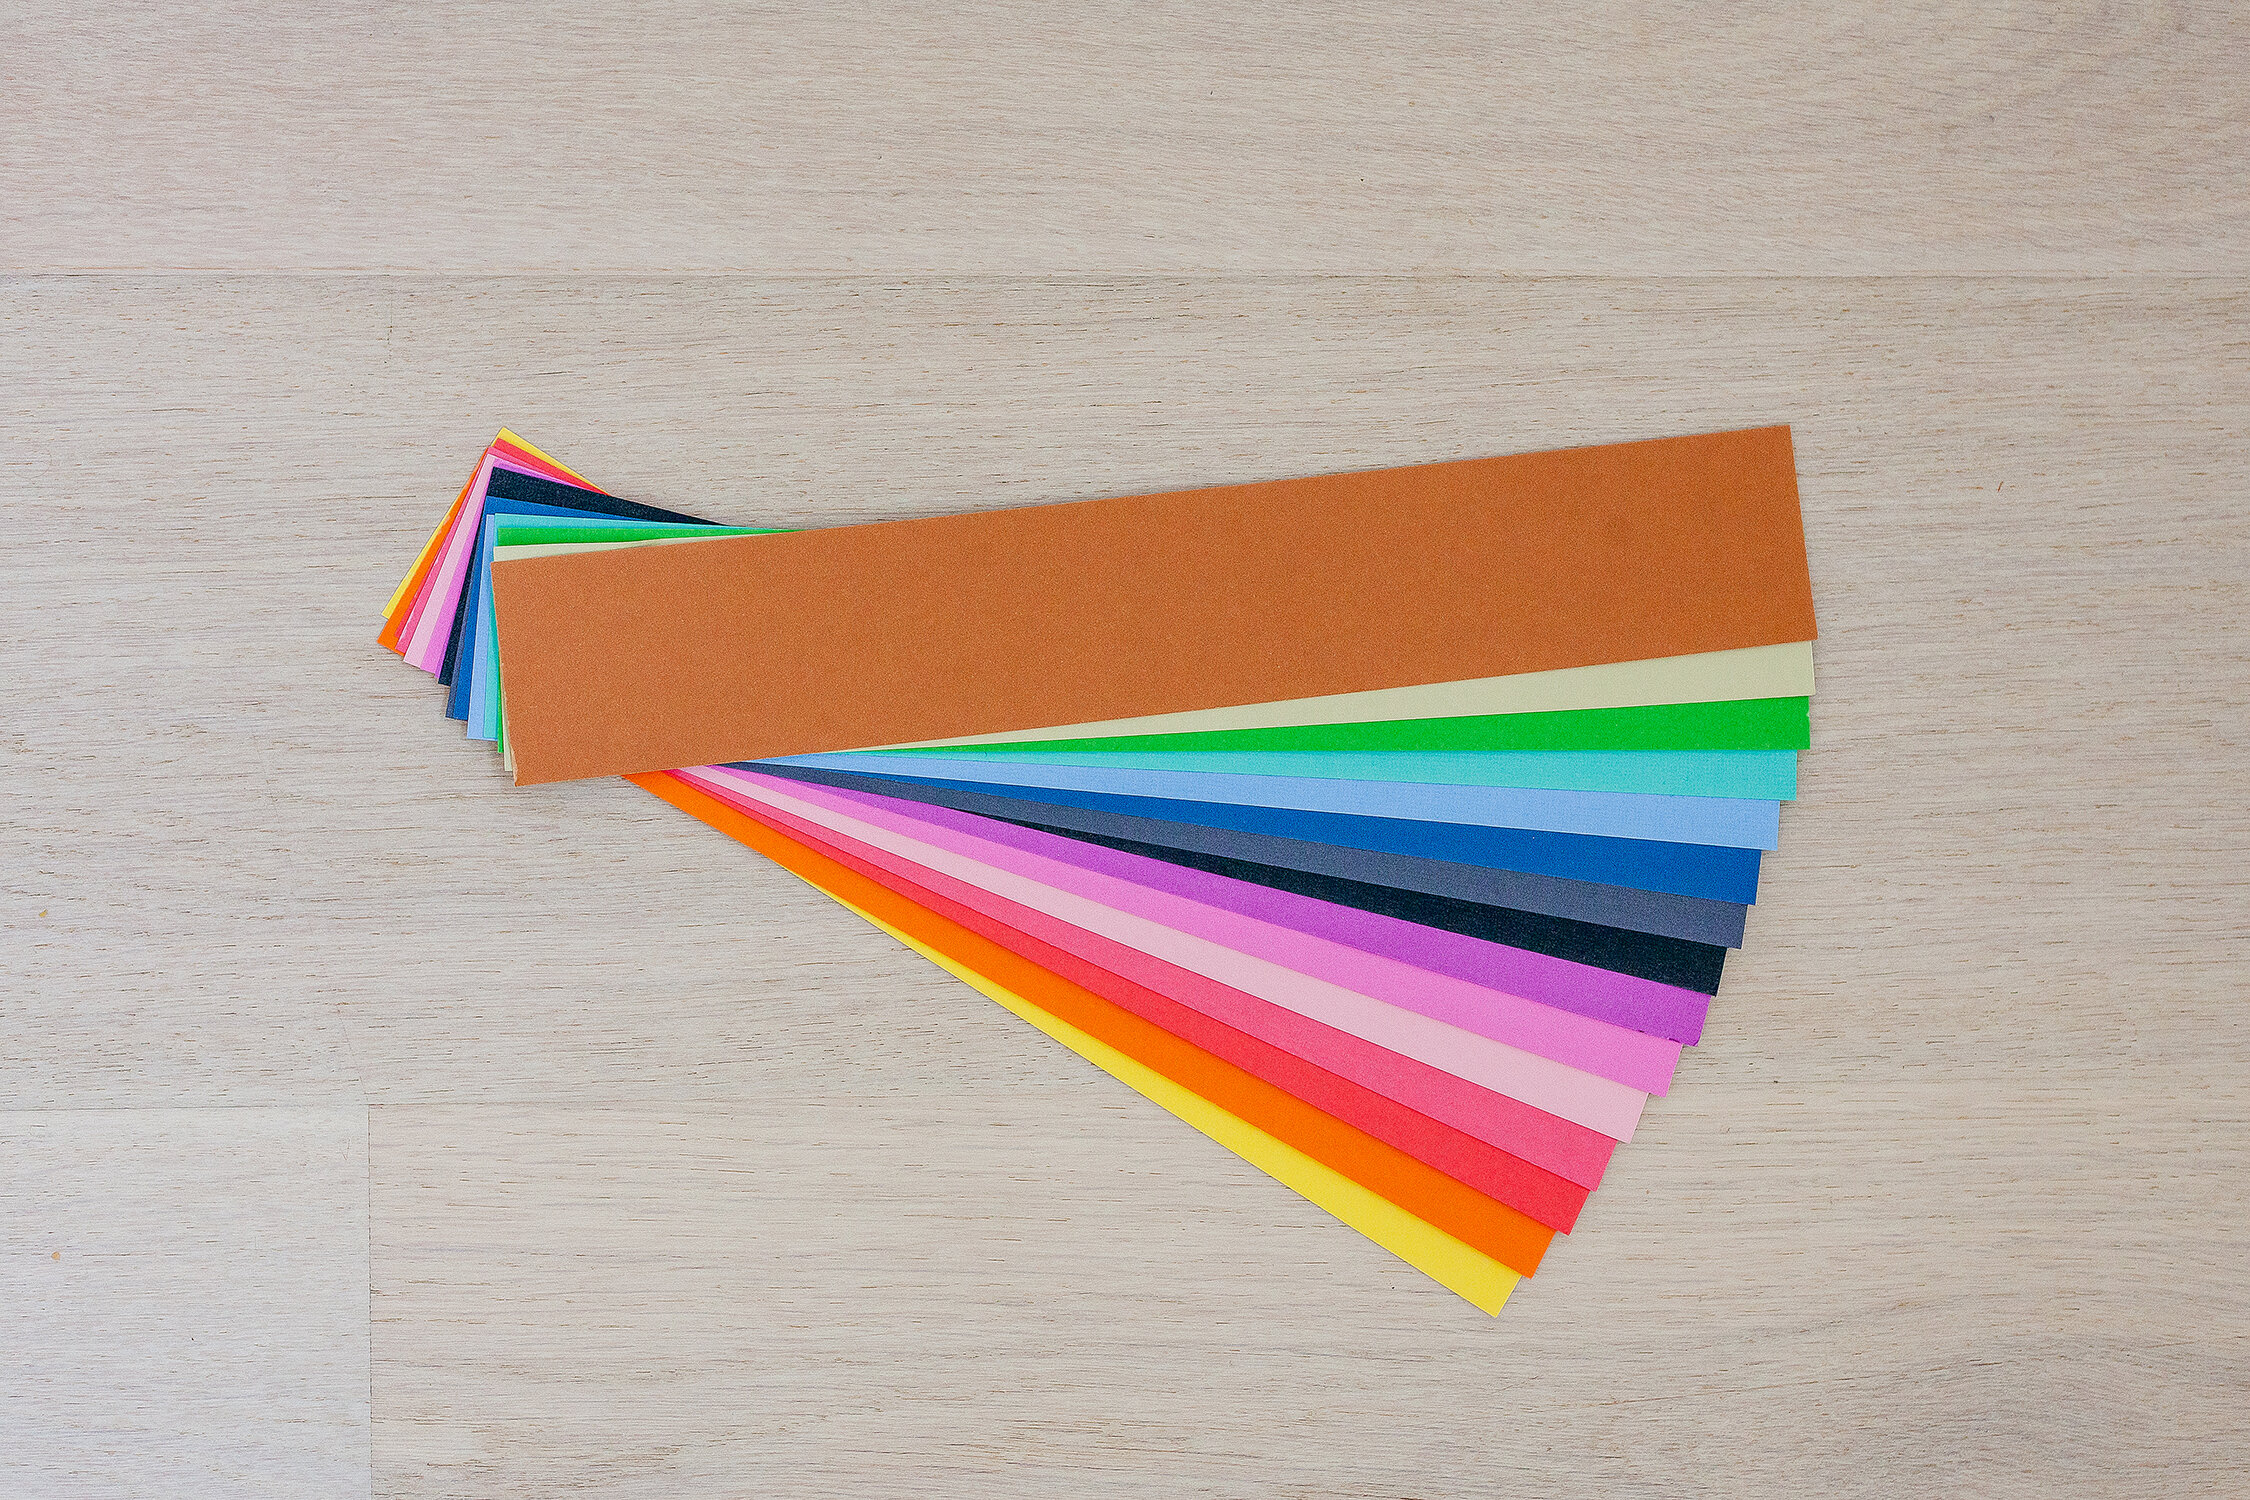
Above: Image captured in the 5D [800 ISO 5.0 and 1/250]
The right equipment is essential to continue learning as an artist, regardless of skill. Although having a solid foundation paves the way for artistic growth, learning is a continuous process. As you progress in understanding, your need for tools that allow you to implement your learning and create your artistic vision will change. Ideally your equipment should evolve at the same level as your skill, because you can only use a tool to the degree you understand its potential. With this in mind as we progress, there are basic tools that you will need as a photographer to get started and nail the fundamental basics of a ‘good’ photograph from a technical standpoint… so let’s jump into it!
Lighting Simplified | What is Light? The Two Main Types
Lighting is the bread and butter of photography, and an understanding and eye for it lives at the core of every photographer’s skill base regardless of genre. Whether you have a passion for portraiture, landscape, studio, commercial or journalistic photography all of these require an ability to see the light which is used to create the image, and manipulate it according to our vision.
For me I think of light in two categories: Natural light, or daylight and ‘Artificial Light’ which is light that is created from an external source. Below, I have captured this beautiful pair of earrings from Bright and Beautiful creator to show the subtle but key differences in these two light forms. On the left is natural light, which when used effectively creates deep rich colour tones, soft tonal variations, and smooth textures. Note how the earring texture is smooth, while the colours are vibrant and warm. On the right is artificial light created with a fill light from my hot-shoe flash [A flash that plugs into the metal square on the top of the camera] and note how the earring texture is apparent, the shadows are more pronounced around the edges of the forms, and the colours are flatter. In certain setups the differences are more pronounced than others, but knowing the difference between when it’s effective to create light versus utilising natural light or available light is key to this decision making process. Both light forms can be equally beautiful, and over this series I will delve into both.

Natural Light Image

Artificial Light Image
Photography Essentials | What tools do you need?
The basic mandatory equipment includes a camera, the right lens for the job and for portraiture this usually means a good quality prime lens. This is a lens that does not zoom, resulting in sharper, clearer images. You’ll also need a means of storing your photographs both temporarily and permanently. if you’re using a film camera: Film, and if you’re using a digital camera: A data storage card and catalogue software such as Adobe Lightroom. Yes you read correctly, the digital image software ‘Lightroom’ is the essential program as opposed to Photoshop, for cataloguing, adjusting, editing and exporting your images. Photoshop is generally used by photographers as a more invasive editing tool, which we’ll cover in later articles of this series. For digital storage you’ll need either a CF or SD card [Compact Flash or Storage Device], and a card reader if you cannot insert this card into your computer directly to transfer your images once you’ve captured them in camera. Finally, you’ll need an external hard drive to store your images on for safe keeping, and for extra security online storage of an additional copy will ensure protection of your images for long term.
Other necessities include a battery and charger, a computer that has the right specifications to operate your editing software, a drink bottle to keep hydrated on the job whether it’s behind the camera or the computer screen, and a good camera bag to protect and transport your camera.

Photo Studio Basics: Photography Equipment Essentials
The DSLR Camera | Which one and how to use it
DSLR stands for Digital Single Lens Reflex, based on the original Single Lens Reflex cameras of the film photography era. These cameras utilised a glass mirror that flipped up during the image capture, allowing photographers to preview their composed photograph with perfect accuracy. If you’ve ever used a polaroid or cheap holiday film camera, you’ve likely noticed that what you see in the preview frame is often different to the final composition, often resulting in headless family portraits! DSLR cameras eliminate this problem, and are made for a variety of purposes from Entry models, to top of the line professional models. The main differences for each and where to buy them.
The main differences between the two models in this article is a full sensor in the professional model versus a crop sensor, affecting the light, colour accuracy and overall picture quality of the camera’s capabilities at its limits. For general use these differences will come up less often, but used more often and under a larger variety of conditions these differences can become very apparent.
The Canon 5D is a suitable professional level model that has four versions, makes 1-4 and is pictured below. It has a variety of modes like entry level models do, but button placement is better, with more options, and a more ergonomic, sturdier body for a large variety of situations and environments. If you are looking for a good quality camera that can assist you in creating your vision, this is the model for you.

The Canon 5DMKII front view, with a 50mm prime portrait lens. Shutter is on the left along with the hand grip, lens dismount button on the right.

Back view of the Canon 5D MKII, with a 32 GB CF card in the memory slot. At the bottom is the off/on/lock switch to prevent settings from being accidentally bumped, scroll dial, view finder at the top with adjustable preview focus to compensate for those who wear glasses, and menu options on the sides.

Top down view of the Canon 5D MKII with the hot shoe mount, to attach flash or other equipment, mode dial on the right and shutter speed dial on the left, with digital display at the top including a built in light up display for night time viewing.
Accessories | Level Up your Photography Game
The first piece of extra equipment that I would recommend additional to the essential items would be a digital drawing pad, preferably a Wacom. This will help to speed up your post-processing or retouching in Adobe Lightroom and Photoshop, by allowing you to adjust your images with precise detail. As you develop your skills and narrow the genre of your choice, specific lenses will become more necessary. For me as I work mostly with people and portraiture, my 70-200mm ‘Tamron’ zoom lens creates beautiful depth of field and has exceptional clarity. For general commercial work, a standard Canon zoom lens of 24-105mm will suit most situations from real estate photography to studio lit product photography. In natural light a large reflector is very handy, a bendy fabric circle allowing you to block or bounce available light at your discretion with a reflective coating. I recommend a silver reflector for a neutral colour tone. Additionally, for experimenting a backdrop stand and coloured paper rolls are best for studio work, I recommend the brand ‘Savage’ for the best colour and quality. A collection of props including furniture and decorations can come in handy when shooting on the fly, as well as a good quality external flash, remote shutter attachment to set your camera to capture the image with the press of a remote comes in handy for self-portraits and bloggers, with which a tripod is also necessary. A great brand for tripods and similar equipment is Manfrotto. Finally, studio lights are a great investment for any committed photographer, giving the ultimate control over every lighting situation.

Equipment accessories including a Wacom digital drawing pad and pen, tripod, reflector, backdrop paper, artificial lights, battery charger, additional lenses and remote shutter attachments for photographing self portraits.
Do’s and Don’ts | What I wish I knew when I started
Three big do’s and don’ts:
DO experiment with angles, lighting type, exposure, aperture | DON’T focus on finding one way to achieve a style, they are many paths to the end result.
DO Plan enough time to do this | DON’T be afraid to make mistakes. It sounds cliche but by welcoming mistakes in your work, you will create growth and evolve as an artist.
DO try out new equipment fully before you use it the first time | DON’T copy the process of others, lacking fundamental knowledge will only stifle your learning.

Top - Kmart, Earrings - Bright and Beautiful, Clips - Aliexpress.com
Tips and Tricks | Photography Secrets
#1. Find your sweet spot - Beautiful lighting isn’t expensive, and it isn’t hard to find you just have to know where to look. Every house and location has a ‘sweet spot’ your job is to find it, and make it work for you not against you. For easy light to work with, look for flat light, work at the right time of day, from a north or south facing window or door for perfect soft light that enriches your colours and is always flattering.
#2. Know your Aperture - Create beautiful bokeh with a low depth of field, whilst still giving yourself enough ‘focus insurance’ especially for bloggers or anyone photographing on a timer, it’s important to make sure the field of focus for your photographs is enough to capture your subject. For fashion bloggers an aperture of around 4.0 is generally pretty good. Keep this setting if you want to allow yourself more room to focus on other aspects of the photograph.
#3. Keep it Simple - Great photography has a clear focus, a clear message and a clear vision. Know what you want before you attempt it and that will increase your chances of success. Prepare, plan and focus on one goal for each photo or photography session before you start. This will train your mind and your eye to look for specific things each time, resulting in higher quality images.
Next in ‘The Photo Studio: Part Two | Natural Light‘
How to photograph in natural light settings, outdoors and indoors.

Above: Sandals from Novo shoes, Earrings made in New Zealand by Bright and Beautiful, Vintage Paisley Swimsuit by Capriosca Swimwear.
Like this post? Follow me on Instagram, Facebook, Twitch, and Pinterest! ♡
New Zealand Photographer & Creative. Love my images? Get in touch with me via The Undefined Photography ♥


